快速代码
# nfs的Server配置文件和配置方法echo '/newnfs 192.168.3.*(rw,sync,no_root_squash)' >> /etc/exports# 根目录新建文件夹,权限777mkdir /newnfs && chmod 777 /newnfs
# 重新启动rpcbind和nfs-server服务systemctl restart rpcbind && systemctl restart nfs-server# nfs的Client# 查看Sever信息showmount -e 192.168.2.197
# 挂载mkdir /newnfsmount -t nfs 192.168.2.197:/newnfs /newnfs
文件传输系列传输文件的方法有很多,比如ssh自带的sftp,vsftp的ftp,samba提供的.
- openssh
- sftp:22/tcp
- sftp是基于ssh实现的,所以启动了sshd后自带sftp,不需要其他额外的配置就可以使用
- vsftp
- ftp:20,21/tpc
- ftp是最”传统”的文件传输协议了,不过报文不加密,抓包就直接可以看到在头部的账号密码,不安全
- samba
- smb:139/udp和445/tcp
- smb是微软创造的协议,目前基础在Windows系统和Linux系统之间传输文件使用
- webdav
- http:?/tcp
- webdav是我最喜欢的传输方式了,如果只需要下载文件,甚至不需要额外的下载软件客户端,只要在web上打开,同时也支持https
- nfs-utils
- nfs:2049/tcp和rpc:111/tcp
- 在多台Linux之间传输文件,nfs无非是最佳的选择,nfs可以将其他Linux主机的文件挂载在本Linux,就想管理本地文件一样的方便
NFS
- 今天来学习一下NFS
NFS概述这里的概述引用了大佬文章:NFS服务详解
- NFS(Network File System)是一种基于TCP/IP传输的网络文件系统协议。通过使用NFS协议,客户机可以像访问本地目录一样访问远程服务器中的共享资源
- NAS存储: NFS服务的实现依赖于RPC (Remote Process Call,远端过程调用)机制,以完成远程到本地的映射过程。
- NFS需要两个程序包
- nfs-utils:负责文件传输的主程序
- rpcbind:可以将RPC程序号码和通用地址互相转换,负责信息传输的
- 二者互有分工,要先启动rpcbind后才可启动nfs.
NFS安装
# 可以先查询一下本机是否有安装了nfs # rpm系列Linuxrpm -aq | grep nfs# deb系列dpkg -l | grep nfs# 查询rpcbind也是同理
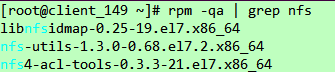
# 没有就安装一下啦# rpm,当然用dnf命令也可以安装的yum install nfs-utils rpcbind # deb apt install nfs-utils rpcbind
NFS_Server配置NFS对应的配置文件为/etc/exports,初始化时文件是空的,#号备注也没有。
[root@client_149 ~]# cat /etc/exports[root@client_149 ~]#
配置文件的格式
1共享目录的路径 2允许访问的NFS客户端ip(3共享权限参数)
- 1、第一项为目录的绝对路径
- 2、允许访问的ip,可以使用通配符,比如192.168.2.*代表192.168.2.0-255都可以访问
- 3、权限参数,有三对
| 参数 | 备注 |
| 文件读写权限相关 |
|
| 登录账号映射匿名 |
|
| 同步数据的方式 |
|
#比如
/root/newdir 192.168.2.149(rw,sync,root_squash)
注意后面的扣号之间不需要空格,这也是个个坑。新建共享文件夹先建立个新的文件夹,并且给足权限,777。
[root@server_197 ~]# mkdir /newnfs[root@server_197 ~]# ll / | grep newnfsdrwxr-xr-x. 2 root root 6 Aug 30 19:57 newnfs[root@server_197 ~]# chmod -R 777 /newnfs/[root@server_197 ~]# ll / | grep newnfsdrwxrwxrwx. 2 root root 6 Aug 30 19:57 newnfs
写入配置
[root@server_197 ~]# echo '/newnfs 192.168.2.*(rw,sync,no_root_squash)' >> /etc/exports[root@server_197 ~]# cat /etc/exports /newnfs192.168.2.(rw,sync,no_root_squash)
固定端口(可选)
如果你在使用ipstables,或者是有有其他网段端口的限制,可能需要固定一下端口。
- nfs使用到端口
- portmapper(rpc-bind提供)端口:111 udp/tcp
- nfs/nfs_acl(nfs提供)端口:2049 udp/tcp
- mountd 端口:32768-65535 udp/tcp
- nlockmgr 端口:32768-65535 udp/tcp
系统 RPC服务在 nfs服务启动时默认会给 mountd 和 nlockmgr 动态选取一个随机端口来进行通讯。在/etc/sysconfig/nfs后追加以下内容,用于固定mountd和nlockmgr端口为4001-4004。
RQUOTAD_PORT=4001LOCKD_TCPPORT=4002LOCKD_UDPPORT=4002MOUNTD_PORT=4003STATD_PORT=4004
可以在这里固定好端口,修改后需要都要重新启动一次服务。启动服务和开机启动使用systemctl来启动rpcbind和nfs-server服务,要注意先启动rpcbind再启动nfs-server
[root@server_197 ~]# systemctl restart rpcbind[root@server_197 ~]# systemctl enable rpcbind[root@server_197 ~]# systemctl restart nfs-server
[root@server_197 ~]# systemctl enable nfs-serverCreated symlink from /etc/systemd/system/multi-user.target.wants/nfs-server.service to /usr/lib/systemd/system/nfs-server.service.
用netstat看一下是不是有端口监听了,有就是启动成功了。
[root@server_197 ~]# netstat -tlpn | grep "2049\|111"tcp 0 0 0.0.0.0:111 0.0.0.0:* LISTEN 1/systemdtcp 0 0 0.0.0.0:2049 0.0.0.0:* LISTEN -tcp6 0 0 :::111 :::* LISTEN 1/systemdtcp6 0 0 :::2049 :::* LISTEN -
firewall和iptablesfirewall放行对应的服务,nfs、rpc-bind、mountd。如果可以建议只保留firewall就可以了。
systemctl stop iptablessystemctl disable iptables[root@server_197 ~]# firewall-cmd --permanent --add-service=nfssuccess[root@server_197 ~]# firewall-cmd --permanent --add-service=rpc-bindsuccess[root@server_197 ~]# firewall-cmd --permanent --add-service=mountdsuccess[root@server_197 ~]# firewall-cmd --reloadsuccess
iptables这个有点局限性,如果非要使用,先依据前面可选的先固定好mountd的端口。我一般情况都先关了iptables留firewall。不过还是这样写一下啦,万一用得上。
以之前设置的mountd固定端口,4001-4004,以及nfs:2049、rpc:111
iptables -A INPUT -p tcp -m tcp --dport 111 -j ACCEPT iptables -A INPUT -p udp -m udp --dport 111 -j ACCEPT iptables -A INPUT -p tcp -m tcp --dport 2049 -j ACCEPTiptables -A INPUT -p udp -m udp --dport 2049 -j ACCEPTiptables -A INPUT -p tcp -m tcp --dport 4001:4004 -j ACCEPT iptables -A INPUT -p udp -m udp --dport 4001:4004 -j ACCEPT# iptables -I : 新加一条规则链# iptables -A :增加一条规则链# ptables -I 添加的规则放在现有规则的最前面,iptables -A 放在现有规则的最后。
重新启动一下防火墙啦
NFS_Client配置
作为使用Client,相当于Sever分享了一块硬盘,我们可以直接挂载在Client本地。
mount挂载
先看一下Sever共享信息,也就是对应我们之前在Sever的/etc/exports的配置。
如果不在许可范围内会提示mount.nfs: access denied by server while mounting。
- showmount -[e|a|v]
- -e,查看共享信息(记住-e就可以了)
- -a,查看本机挂载的文件资源的情况NFS资源的情况
- -v,查看nfs版本
mount -t nfs 192.168.2.197:/newnfs /newnfs
- 将192.168.2.197:/newnfs挂载在本机的/newnfs,因为之前设置了权限这个文件夹是777
[root@client_149 ~]# showmount -e 192.168.2.197 #看一下先Sever共享信息Export list for 192.168.2.197:/newnfs 192.168.2.*[root@client_149 ~]# mount -t nfs 192.168.2.197:/newnfs /newnfs
- 也可以从根目录全部挂载,不过因为没有权限,还是只可以看到设置777权限的/newnfs
# 新建个文件夹用于挂载Server的根目录[root@client_149 ~]# mkdir /nfs_197# 挂载[root@client_149 ~]# mount -t nfs 192.168.2.197:/ /nfs_197# 查看一下挂载好的目录内容[root@client_149 ~]# ll /nfs_197total 0drwxrwxrwx. 2 root root 20 Aug 31 01:30 newnfs
自动挂载fstab挂载
重新启动后就要重新挂载啦,我们可以编辑一下/etc/fstab设置一下自动挂载。
在最后面追加
echo '192.168.2.197:/newnfs /newnfs nfs 0 0' >> /etc/fstab如果不生效,将自动挂载也设置为开机启动
systemctl start remote-fs.targetsystemctl enable remote-fs.target开机执行
当然,也可以开机时候自动执行挂载的命令/etc/rc.local
# 把之前的mount命令追加到rc.local的末尾[root@client_149 ~]# echo 'mount -t nfs 192.168.2.197:/newnfs /newnfs' >> /etc/rc.local# 追加完成后看一下[root@client_149 ~]# cat /etc/rc.local | grep -v "#"touch /var/lock/subsys/localmount -t nfs 192.168.2.197:/newnfs /newnfs
这里记得要这个/etc/rc.local可执行+x
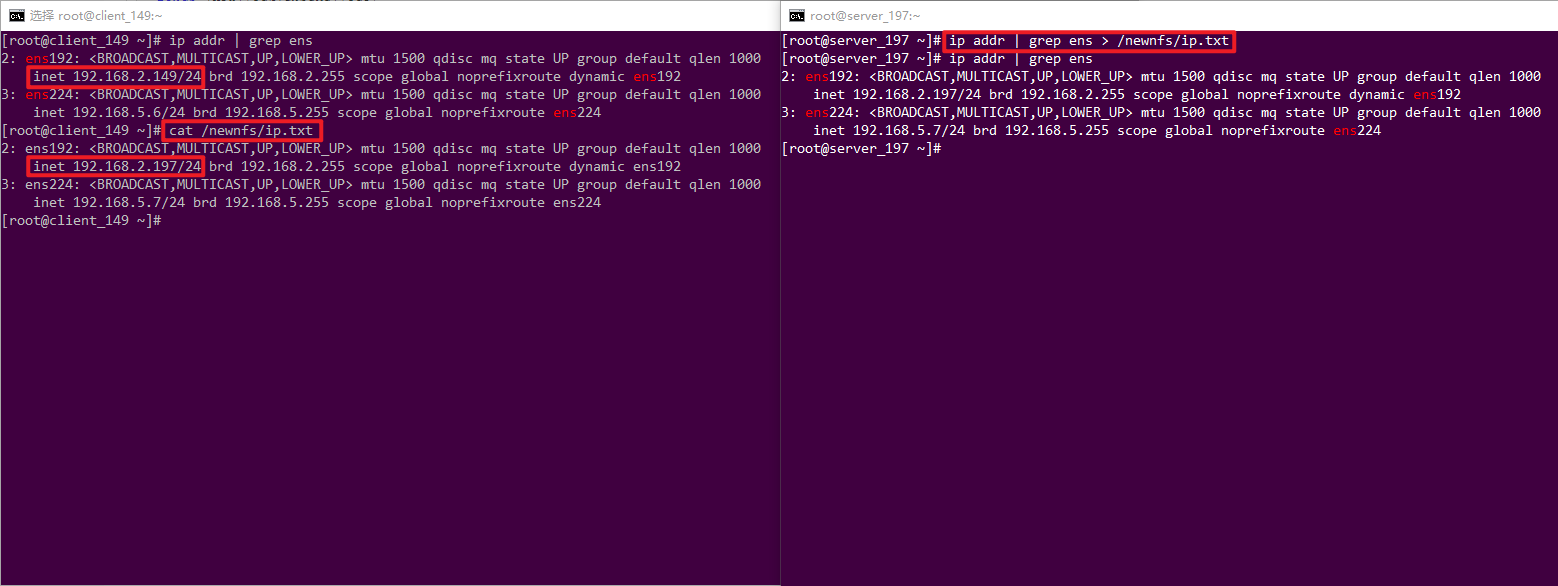
测试
目前Server和Client都已经配置好,我们在Server、Client任意主机在共享、挂载的目录内新建个文件,再在另一主机上查看一下。