TCP客户端&服务端QT开发TCP Client1.Widget类写UI界面,创建socket对象
Widget::Widget(QWidget *parent) : QWidget(parent) , ui(new Ui::Widget){ ui->setupUi(this); socket = new QTcpSocket; //创建socket对象}2.取消按键槽函数
// 直接关闭窗口即可void Widget::on_cancelButton_clicked(){ this->close();}3.连接按键槽函数3.1获取ip和port
// 获取ip地址和端口号QString ip = ui->ipLineEdit->text();QString port = ui->portLineEdit->text();3.2连接服务器
socket第一个参数,QString->QHostAddress;第二个参数QString->short.
// 连接服务器socket->connectToHost(QHostAddress(ip), port.toShort());3.3连接成功,发出信号
指向新页面,同时堆区创建指针,避免该进程结束后自动回收相关的成员函数和局部变量,同时传入socket变量进入chat类中。
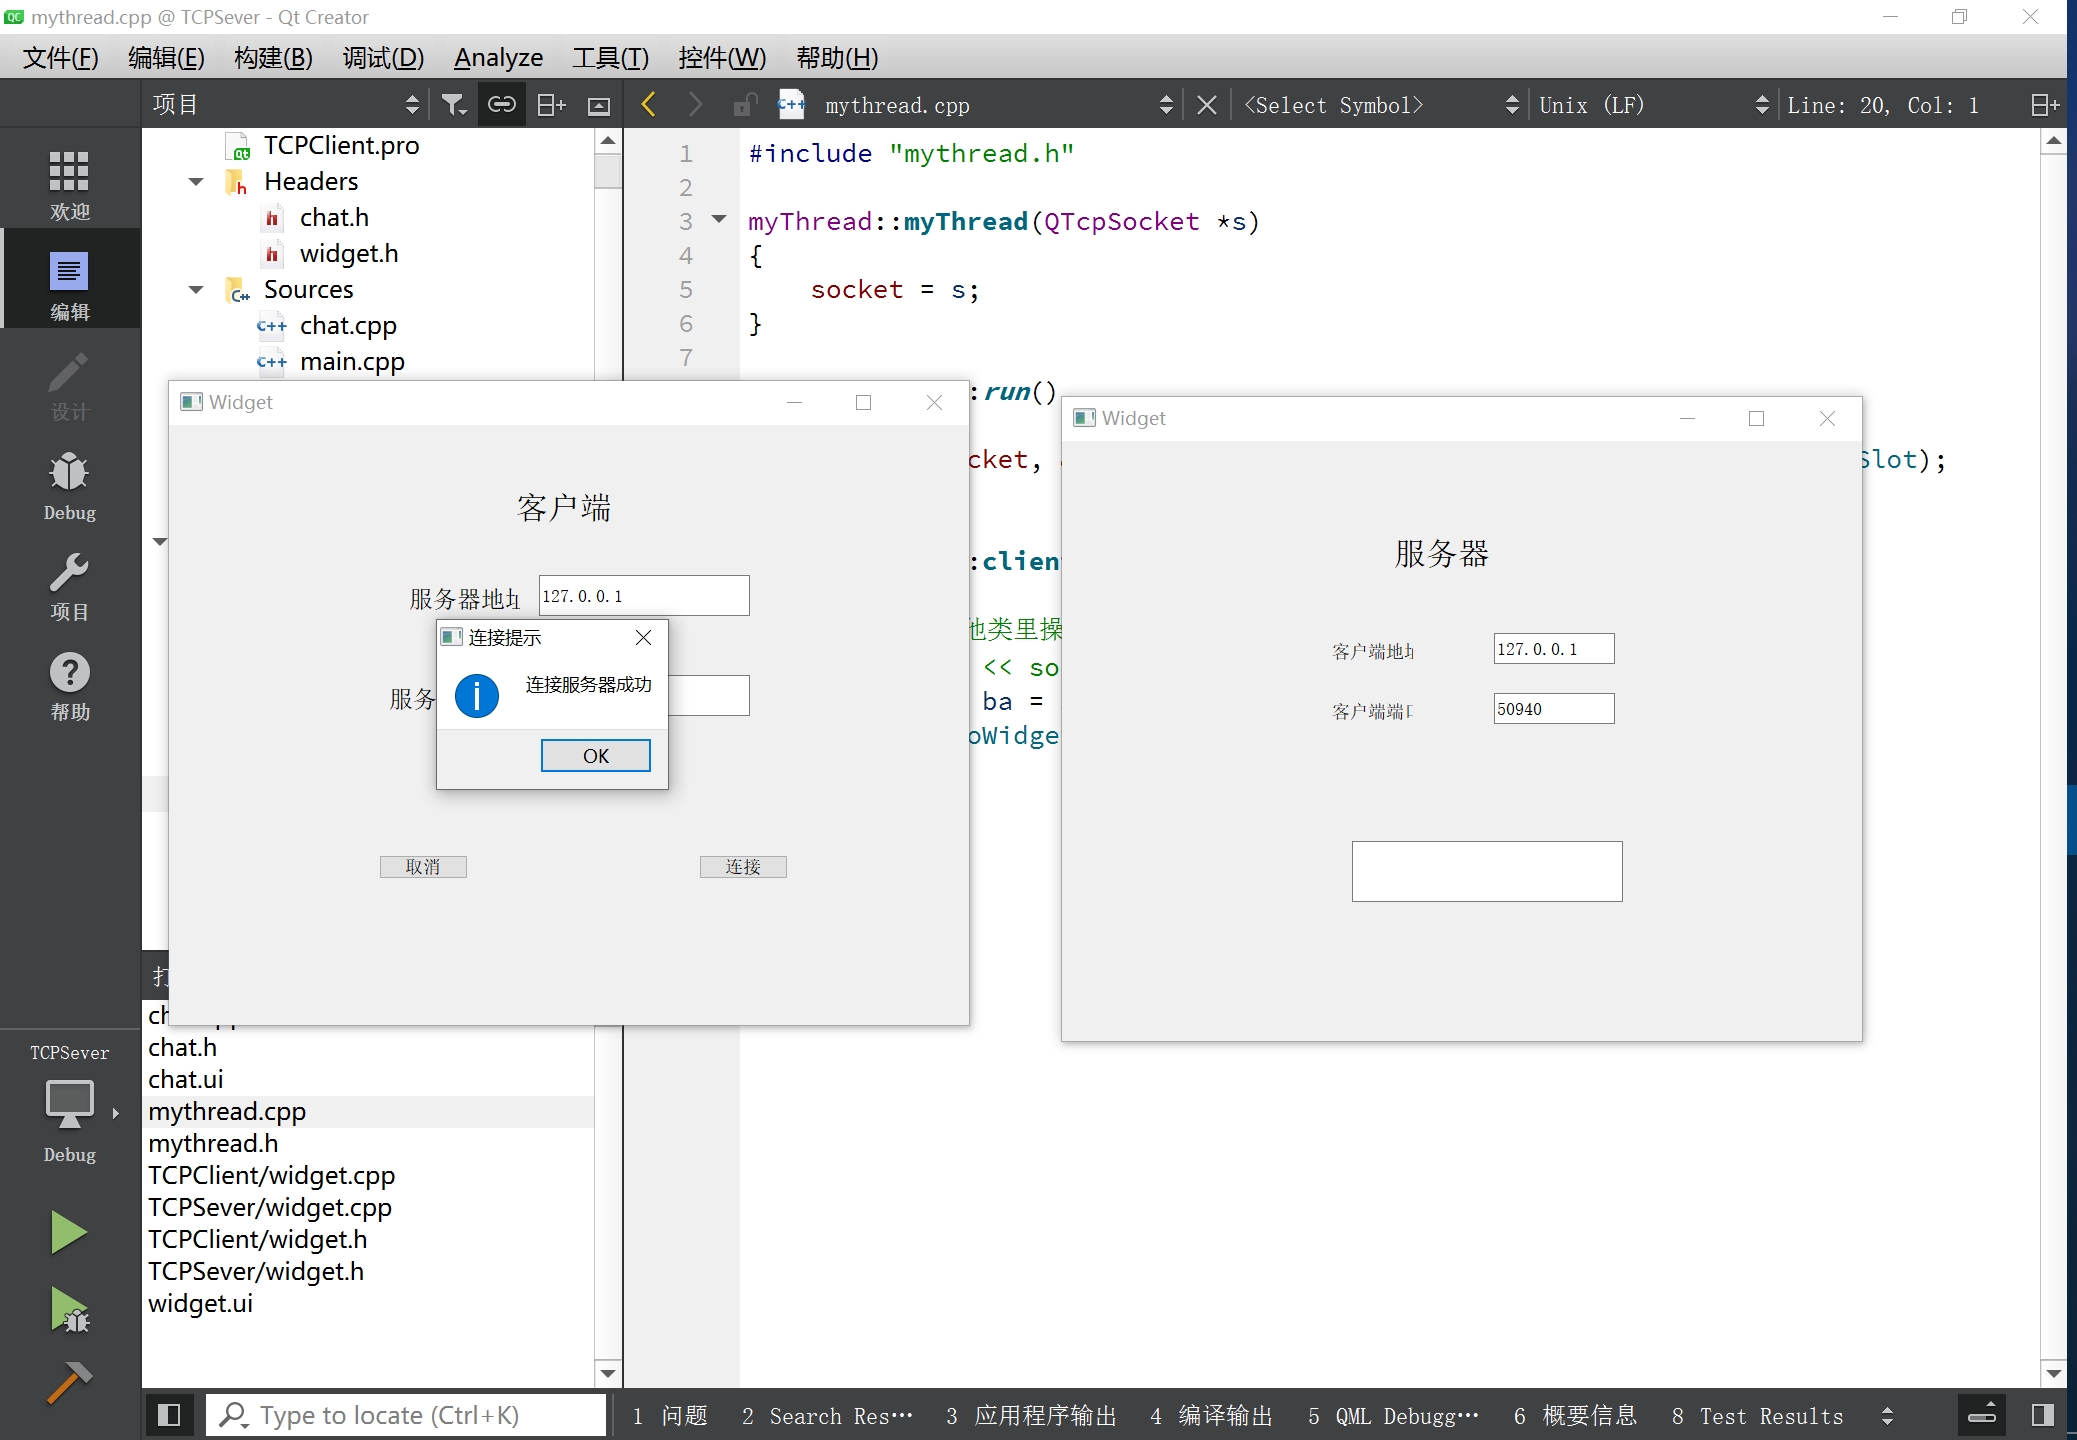
// 连接服务器成功,socket对象发出信号connect(socket, &QTcpSocket::connected, [this](){ QMessageBox::information(this, "连接提示", "连接服务器成功"); this->hide(); Chat *c = new Chat(socket); //堆空间创建 c->show();});3.4连接失败,发出信号
// 连接一异常, socket发出信号connect(socket, &QTcpSocket::disconnected, [this](){ QMessageBox::warning(this, "连接提示", "连接异常,网络断开");});4.Chat类写UI界面,接收socket参数
构造函数,传入socket内容
###---chat.h---###class Widget : public QWidget{ Q_OBJECTpublic: Widget(QWidget *parent = nullptr); ~Widget();private slots: void on_cancelButton_clicked(); void on_connetButton_clicked();private: Ui::Widget *ui; QTcpSocket *socket;};###---chat.c---###Chat::Chat(QTcpSocket *s, QWidget *parent) : QWidget(parent), ui(new Ui::Chat){ ui->setupUi(this); socket = s;}5.清空发送文本槽函数
void Chat::on_clearButton_clicked(){ ui->lineEdit->clear();}6.发送槽函数
socket->write()函数封装好了,要求发送数据为QByteArray格式。
void Chat::on_sendButton_clicked(){ QByteArray ba; ba.append(ui->lineEdit->text()); socket->write(ba);}TCP Sever1.Widget类写UI界面,创建QTcpServer对象
Widget::Widget(QWidget *parent) : QWidget(parent) , ui(new Ui::Widget){ ui->setupUi(this); server = new QTcpServer; server->listen(QHostAddress::AnyIPv4, PORT); // 客户端发起连接, server发出信号 connect(server, &QTcpServer::newConnection, this, &Widget::newClientHandler);}2.服务端处理槽函数
建立连接 —-> 启动线程(服务端多线程),传入socket参数
void Widget::newClientHandler(){ // 建立TCP连接 QTcpSocket *socket = server->nextPendingConnection(); //socket->peerAddress(); //获取客户端地址 //socket->peerPort(); //获取端口号 ui->ipLineEdit->setText(socket->peerAddress().toString()); ui->portLineEdit->setText(QString::number(socket->peerPort())); // 服务器收到客户端信息, socket发出readyread信号 //connect(socket, &QTcpSocket::readyRead, this, &Widget::clientInfoSlot); // 启动线程 myThread *t = new myThread(socket); //创建线程对象 t->start(); //开始线程 connect(t, &myThread::sendToWidget, this, &Widget::threadSlot);}3.线程类3.1初始化
myThread::myThread(QTcpSocket *s){ socket = s;}void myThread::run(){ connect(socket, &QTcpSocket::readyRead, this, &myThread::clientInfoSlot);}3.2槽函数
void myThread::clientInfoSlot(){ // 不能在其他类里操作界面 //qDebug() <readAll(); QByteArray ba = socket->readAll(); emit sendToWidget(ba); //发送信号,信号中带参数}3.3自定义信号
class myThread : public QThread{ Q_OBJECTpublic: explicit myThread(QTcpSocket *s); void run();signals: void sendToWidget(QByteArray b);public slots: void clientInfoSlot();private: QTcpSocket *socket;};3.4显示槽函数
void Widget::threadSlot(QByteArray b){ ui->mainLineEdit->setText(QString(b));}成果展示
连接:
多线程: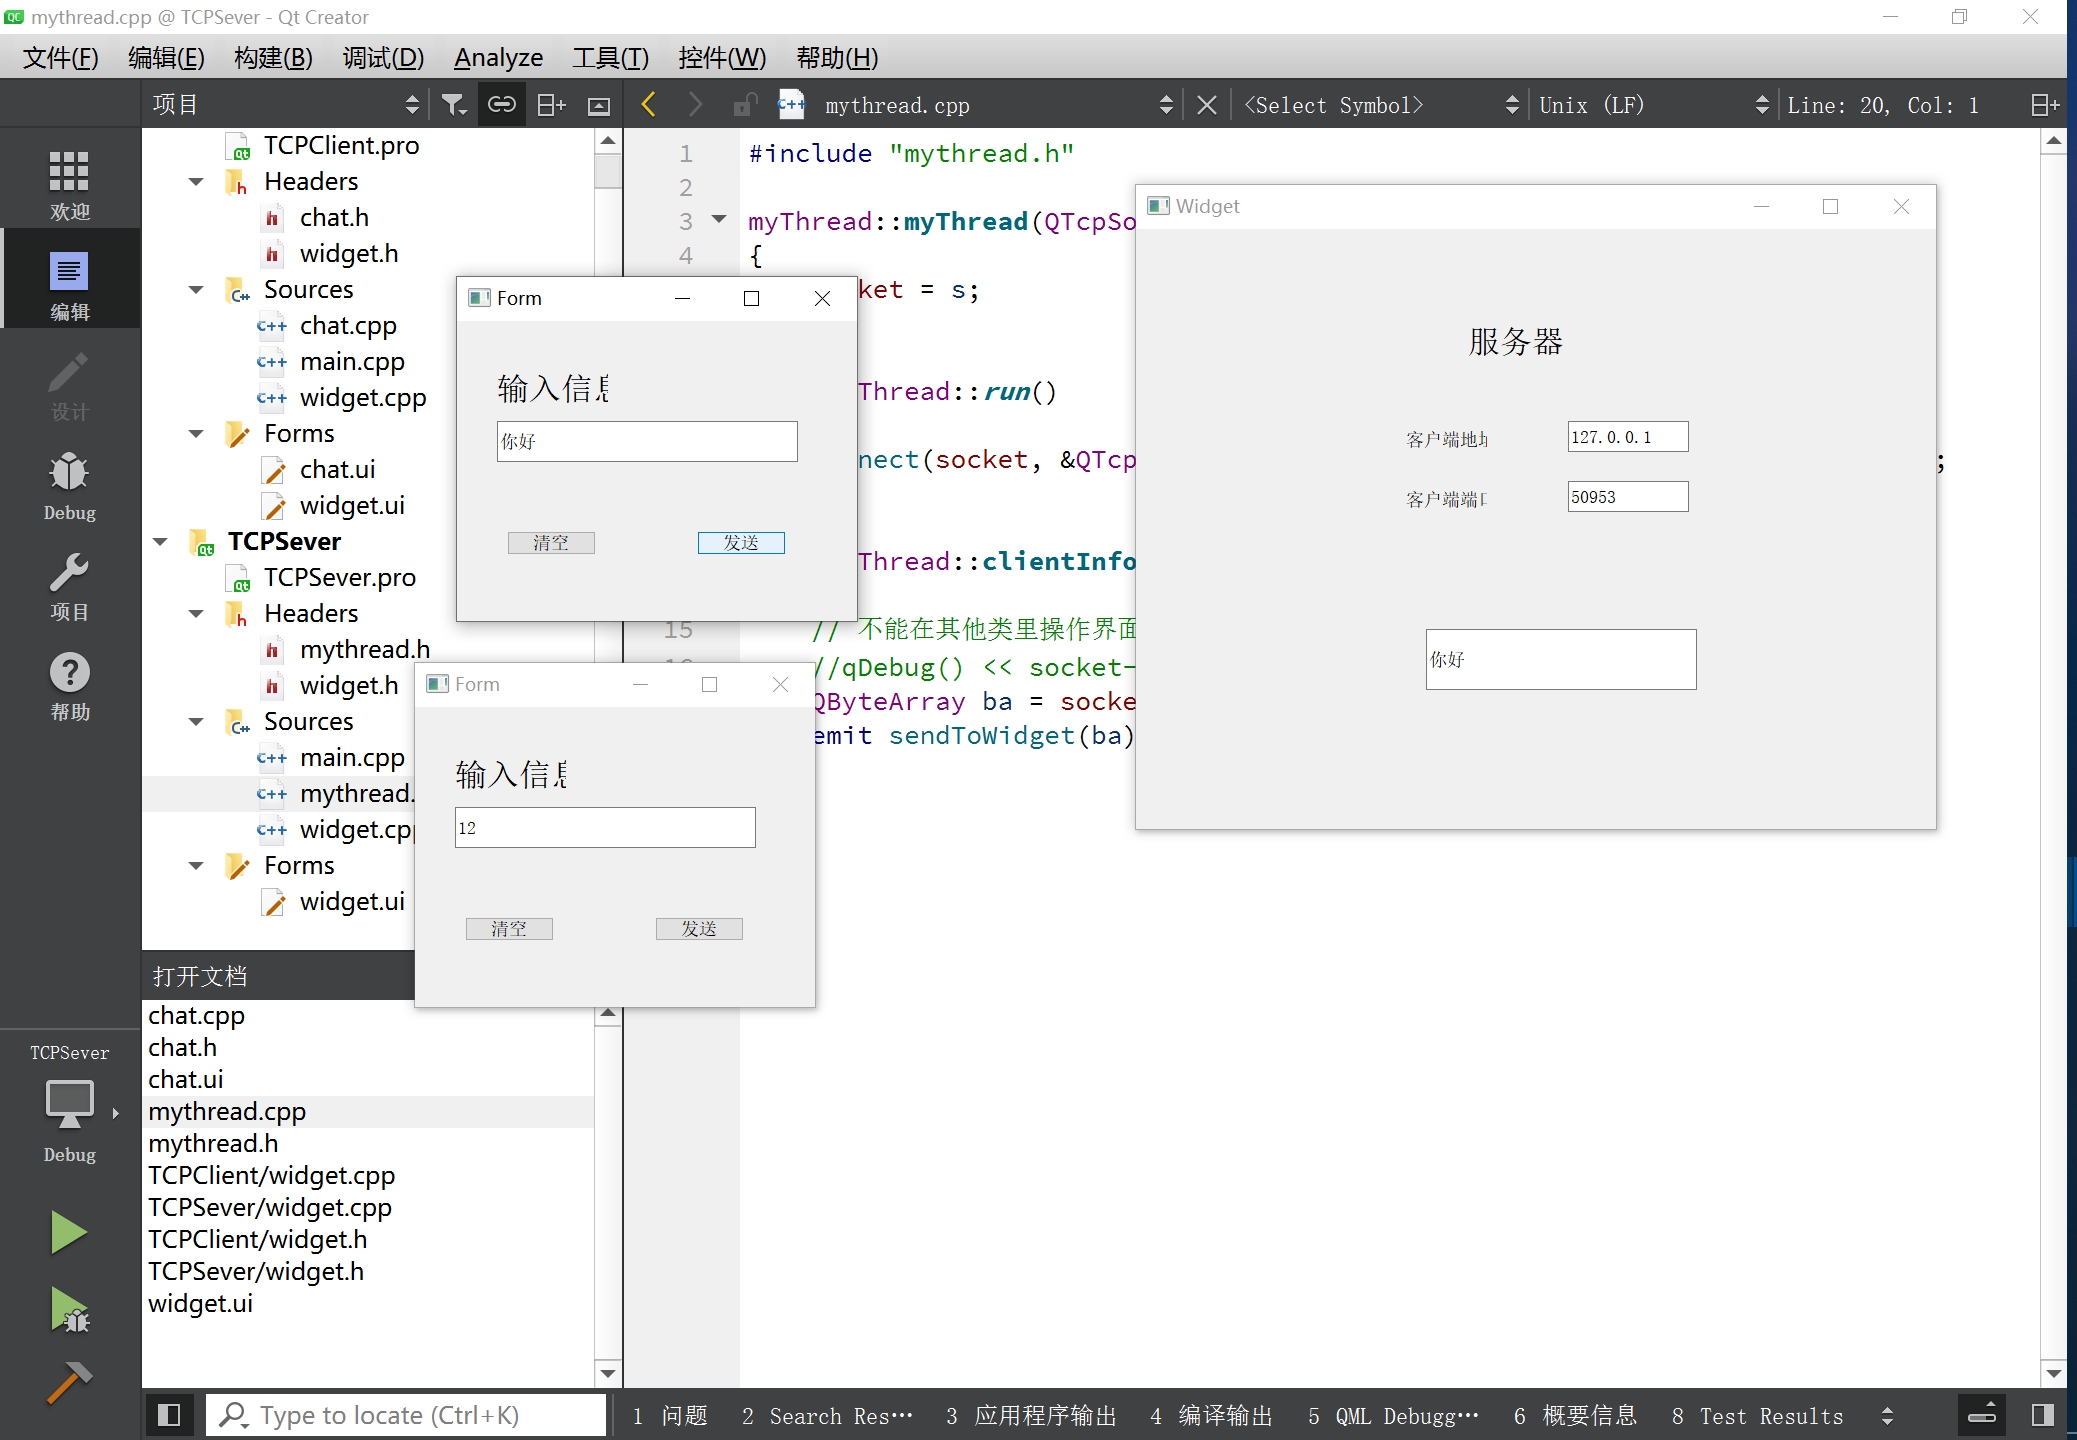
你好我叫郑某人,期待你的关注!