〇、参考资料1、hutool介绍
https://blog.csdn.net/abst122/article/details/124091375
2、Spring Boot+Mybatis实现登录注册
https://www.cnblogs.com/wiki918/p/16221758.html
3、Spring Boot读取自定义配置文件
https://www.yisu.com/zixun/366877.html
4、Spring Boot读取properties配置文件的两种方式
https://blog.csdn.net/weixin_42352733/article/details/121830775
一、概述1、技术栈
Spring Boot+Mybatis+Lombok+Hutool+Slf4j+thymeleaf
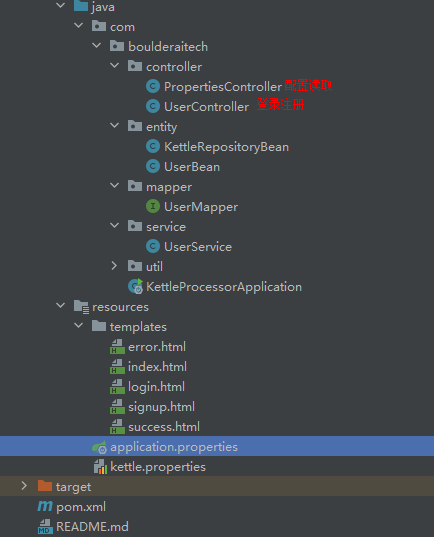
2、项目截图
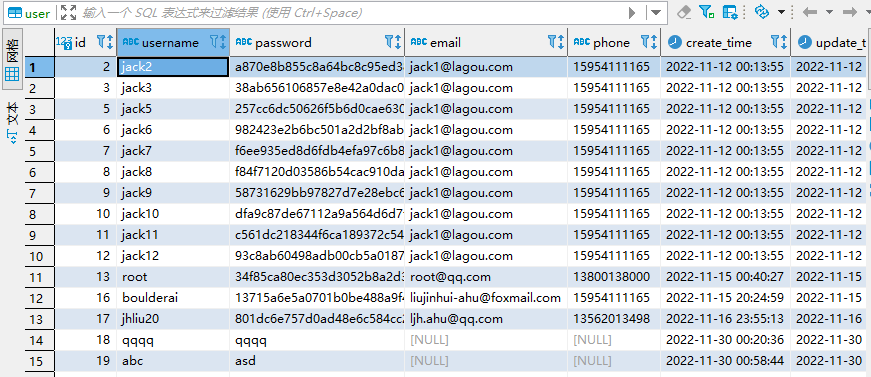
二、登录注册(后台)1、数据库设计
表结构:
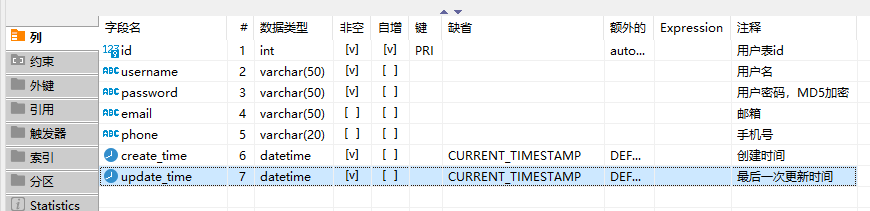
表数据:

建表语句:
CREATE TABLE `user` ( `id` int NOT NULL AUTO_INCREMENT COMMENT '用户表id', `username` varchar(50) NOT NULL COMMENT '用户名', `password` varchar(50) NOT NULL COMMENT '用户密码,MD5加密', `email` varchar(50) DEFAULT NULL COMMENT '邮箱', `phone` varchar(20) DEFAULT NULL COMMENT '手机号', `create_time` datetime NOT NULL DEFAULT CURRENT_TIMESTAMP COMMENT '创建时间', `update_time` datetime NOT NULL DEFAULT CURRENT_TIMESTAMP COMMENT '最后一次更新时间', PRIMARY KEY (`id`)) ENGINE=InnoDB AUTO_INCREMENT=19 DEFAULT CHARSET=utf8mb4 COLLATE=utf8mb4_0900_ai_ci COMMENT='用户表'2、POJO(Entity)编写-UserBean.java
package com.boulderaitech.entity;import com.fasterxml.jackson.annotation.JsonFormat;import lombok.AllArgsConstructor;import lombok.Data;import lombok.NoArgsConstructor;import java.io.Serializable;import java.util.Date;@Data //提供了set、get方法及toString@AllArgsConstructor@NoArgsConstructorpublic class UserBean implements Serializable { private Integer id; //为什么用Integer,不用int private String username; private String password; private String email; private String phone; @JsonFormat(pattern = "yyyy-MM-mm HH:mm:ss") private Date create_time; @JsonFormat(pattern = "yyyy-MM-mm HH:mm:ss") private Date update_time;}3、Controller编写-UserController.java
package com.boulderaitech.controller;import cn.hutool.core.lang.Opt;import cn.hutool.core.util.StrUtil;import com.boulderaitech.entity.UserBean;import com.boulderaitech.service.UserService;import lombok.extern.slf4j.Slf4j;import org.springframework.beans.factory.annotation.Autowired;import org.springframework.stereotype.Controller;import org.springframework.web.bind.annotation.RequestMapping;import org.springframework.web.bind.annotation.RequestMethod;@Slf4j@Controller // 不能用@RestControllerpublic class UserController { //将Service注入Web层 @Autowired UserService userService; //用户测试 @RequestMapping("/hello") public String hello() { return "login"; } @RequestMapping("https://www.cnblogs.com/register") public String register() { return "signup"; } @RequestMapping(value = "/login", method = RequestMethod.POST) public String login(String username,String password) { UserBean userBean = userService.login(username,password); log.info("username:{}",username); log.info("password:{}",password); //hutool-core核心,包括Bean操作、日期、各种Util等 if(StrUtil.isNotEmpty(username)) { if(userBean != null) { return "success"; //方法引用-遍历集合 //Opt.ofEmptyAble(userBean).ifPresent(System.out::println); } } else { return "用户名不允许为空"; } return "error"; } @RequestMapping(value = "/signup", method = RequestMethod.POST) public String signup(String username,String password) { userService.insert(username,password); return "success"; }}4、Service编写-UserService.java
package com.boulderaitech.service;import com.boulderaitech.entity.UserBean;import com.boulderaitech.mapper.UserMapper;import org.springframework.stereotype.Service;import javax.annotation.Resource;@Servicepublic class UserService { //将dao层属性注入service层,为什么不用Autowired @Resource private UserMapper userMapper; public UserBean login(String username, String password) { return userMapper.getInfo(username,password); } public void insert(String username, String password) { userMapper.saveUser(username,password); }}5、Mapper编写-UserMapper.java
package com.boulderaitech.mapper;import com.boulderaitech.entity.UserBean;import org.apache.ibatis.annotations.Insert;import org.apache.ibatis.annotations.Mapper;import org.apache.ibatis.annotations.Param;import org.apache.ibatis.annotations.Select;@Mapper //添加Mapper注解,就不用写xml的mapper映射文件了public interface UserMapper { //多个参数要加@Param修饰 //思考:xml中的代码片段怎么配 @Select("SELECT * FROM user WHERE username=#{username} AND password= #{password}") UserBean getInfo(@Param("username") String username,@Param("password") String password); @Insert("INSERT INTO user(username,password) VALUE(#{username},#{password})") void saveUser(@Param("username") String username,@Param("password") String password);}6、配置文件编写-application.properties
# Spring Boot端口号server.port=9088# 数据源配置spring.datasource.driver-class-name=com.mysql.cj.jdbc.Driverspring.datasource.password=qaz123spring.datasource.username=rootspring.datasource.url=jdbc:mysql://192.168.40.111:3306/visualization?serverTimezone=UTC&useUnicode=true&characterEncoding=utf-8&useSSL=truespring.thymeleaf.prefix=classpath:/templates/7、启动类编写-KettleProcessorApplication.java
package com.boulderaitech;import org.springframework.boot.SpringApplication;import org.springframework.boot.autoconfigure.SpringBootApplication;/** * Spring Boot启动类,加Spring Boot注解,调用Spring的静态run方法 */@SpringBootApplicationpublic class KettleProcessorApplication { public static void main(String[] args) { SpringApplication.run(KettleProcessorApplication.class); }}三、登录注册(前台)1、登录页面-login.html
login 账号:
密码:
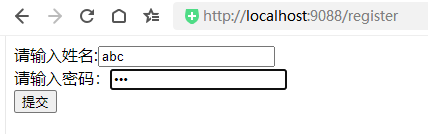
注册2、注册页面-signup.html
        注册    请输入姓名:
    请输入密码:
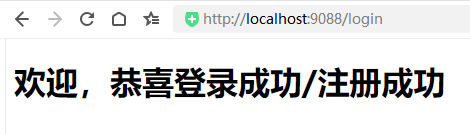
3、成功页面-success.html
success 欢迎,恭喜登录成功/注册成功
4、失败页面-error.html
error 登录失败!
四、配置读取1、配置编写-kettle.properties
# 读取properties的两种方式:https://blog.csdn.net/weixin_42352733/article/details/121830775environment=xuelei-wwwkettle.repository.type=databasekettle.repository.username=adminkettle.repository.password=admin2、POJO(Entity)编写-KettleRepositoryBean.java
package com.boulderaitech.entity;import lombok.AllArgsConstructor;import lombok.Data;import lombok.NoArgsConstructor;import org.springframework.boot.context.properties.ConfigurationProperties;import org.springframework.stereotype.Component;@Data@Component@NoArgsConstructor@AllArgsConstructor@ConfigurationProperties(prefix = "kettle.repository")public class KettleRepositoryBean { private String type; private String username; private String password;}3、Controller编写-PropertiesController.java
package com.boulderaitech.controller;import com.boulderaitech.entity.KettleRepositoryBean;import org.springframework.beans.factory.annotation.Autowired;import org.springframework.beans.factory.annotation.Value;import org.springframework.context.annotation.PropertySource;import org.springframework.web.bind.annotation.RequestMapping;import org.springframework.web.bind.annotation.RestController;@RestController //Controller和RestCOntroller的区别@PropertySource("classpath:kettle.properties") //默认是application.propertiespublic class PropertiesController { @Value("${environment}") private String envName; @Autowired private KettleRepositoryBean kettleRepositoryBean; @RequestMapping("/getEnv") public String getEnv() { return "hello " + envName; } @RequestMapping("/getRepoInfo") public String getRepoInfo() { return "hello " + kettleRepositoryBean.toString(); }}五、验证1、登录
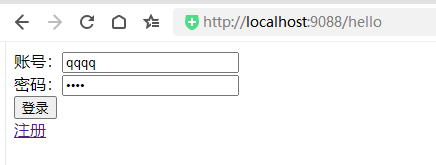
2、注册
3、读取单个配置

4、读取实体类配置(多个)

本文来自博客园,作者:哥们要飞,转载请注明原文链接:https://www.cnblogs.com/liujinhui/p/16937229.html