基于Docker安装的Stable Diffusion使用CPU进行AI绘画
由于博主的电脑是为了敲代码考虑买的,所以专门买的高U低显,i9配核显,用Stable Diffusion进行AI绘画的话倒是专门有个CPU模式,不过安装过程经历了许多坎坷,特此记录一下
博主的环境是Windows 11附带的WSL2中安装的Ubuntu 20.04 LTS,安装的Stable Diffusion Docker版本为2.1.0
安装条件
- 安装Docker
- 安装DockerCompose
- 会Docker(博主说的比较粗略,不建议没有docker经验的按本博客进行)
一、下载代码
地址:https://github.com/AbdBarho/stable-diffusion-webui-docker/archive/refs/tags/2.1.0.zip
解压到你需要的路径
二、修改路径
wsl2对应windows的路径如: D:/soft –> /mnt/d/soft
在你上个解压的文件里面的docker-compose.yml中更改路径
例如build: ./services/download/改为build: /mnt/d/wsl/stable-diffusion-webui/stable-diffusion-webui-docker-2.1.0/services/download/三、构建下载
命令为
docker compose --profile download up --build四、构建镜像
- 主要的坑也是这里了,需要修改service/AUTOMATIC1111/Dockerfile,修改为下方代码
博主删除了不必要的xformers(必须要google drive,而且开了代理也不行,cpu模式不需要这个东西),然后对git加了代理,然后修改了git的配置
# syntax=docker/dockerfile:1FROM alpine/git:2.36.2 as downloadSHELL ["/bin/sh", "-ceuxo", "pipefail"]RUN git config --global http.version HTTP/1.1RUN git config --global http.postBuffer 524288000RUN git config --global https.postBuffer 524288000RUN git config --global core.compression -1RUN git clone https://github.91chi.fun/https://github.com/salesforce/BLIP.git repositories/BLIP && cd repositories/BLIP && git reset --hard 48211a1594f1321b00f14c9f7a5b4813144b2fb9RUN git clone https://github.91chi.fun/https://github.com/sczhou/CodeFormer.git repositories/CodeFormer && cd repositories/CodeFormer && git reset --hard c5b4593074ba6214284d6acd5f1719b6c5d739afRUN git clone https://github.91chi.fun/https://github.com/CompVis/stable-diffusion.git repositories/stable-diffusion && cd repositories/stable-diffusion && git reset --hard 69ae4b35e0a0f6ee1af8bb9a5d0016ccb27e36dcRUN <<EOF# because taming-transformers is hugegit config --global http.postBuffer 1048576000git clone https://github.91chi.fun/https://github.com/CompVis/taming-transformers.git repositories/taming-transformerscd repositories/taming-transformersgit reset --hard 24268930bf1dce879235a7fddd0b2355b84d7ea6rm -rf data assetsEOFRUN git clone https://github.91chi.fun/https://github.com/crowsonkb/k-diffusion.git repositories/k-diffusion && cd repositories/k-diffusion && git reset --hard f4e99857772fc3a126ba886aadf795a332774878FROM python:3.10-slimSHELL ["/bin/bash", "-ceuxo", "pipefail"]ENV DEBIAN_FRONTEND=noninteractive PIP_PREFER_BINARY=1 PIP_NO_CACHE_DIR=1RUN pip install torch==1.12.1+cu113 torchvision==0.13.1+cu113 --extra-index-url https://download.pytorch.org/whl/cu113RUN apt-get update && apt install fonts-dejavu-core rsync git -y && apt-get cleanRUN <<EOFgit clone https://github.91chi.fun/https://github.com/AUTOMATIC1111/stable-diffusion-webui.gitcd stable-diffusion-webuigit reset --hard 1eb588cbf19924333b88beaa1ac0041904966640pip install -r requirements_versions.txtEOFENV ROOT=/stable-diffusion-webui \ WORKDIR=/stable-diffusion-webui/repositories/stable-diffusionCOPY --from=download /git/ ${ROOT}RUN pip install --prefer-binary --no-cache-dir -r ${ROOT}/repositories/CodeFormer/requirements.txt# TODO: move to topRUN apt-get install jq moreutils -y# Note: don't update the sha of previous versions because the install will take forever# instead, update the repo state in a later stepARG SHA=36a0ba357ab0742c3c4a28437b68fb29a235afbeRUN <<EOFcd stable-diffusion-webuigit pull --rebasegit reset --hard ${SHA}pip install --prefer-binary --no-cache-dir -r requirements_versions.txtEOFRUN pip install --prefer-binary --no-cache-dir opencv-python-headless \ git+https://github.91chi.fun/https://github.com/TencentARC/GFPGAN.git@8d2447a2d918f8eba5a4a01463fd48e45126a379 \ git+https://github.91chi.fun/https://github.com/openai/CLIP.git@d50d76daa670286dd6cacf3bcd80b5e4823fc8e1 \ pyngrokCOPY . /dockerRUN <<EOFchmod +x /docker/mount.sh && python3 /docker/info.py ${ROOT}/modules/ui.pyEOFENV CLI_ARGS=""WORKDIR ${WORKDIR}EXPOSE 7860# run, -u to not buffer stdout / stderrCMD /docker/mount.sh && \ python3 -u ../../webui.py --listen --port 7860 --ckpt-dir ${ROOT}/models/Stable-diffusion ${CLI_ARGS}- 修改以后运行
docker compose --profile auto-cpu up --build结果
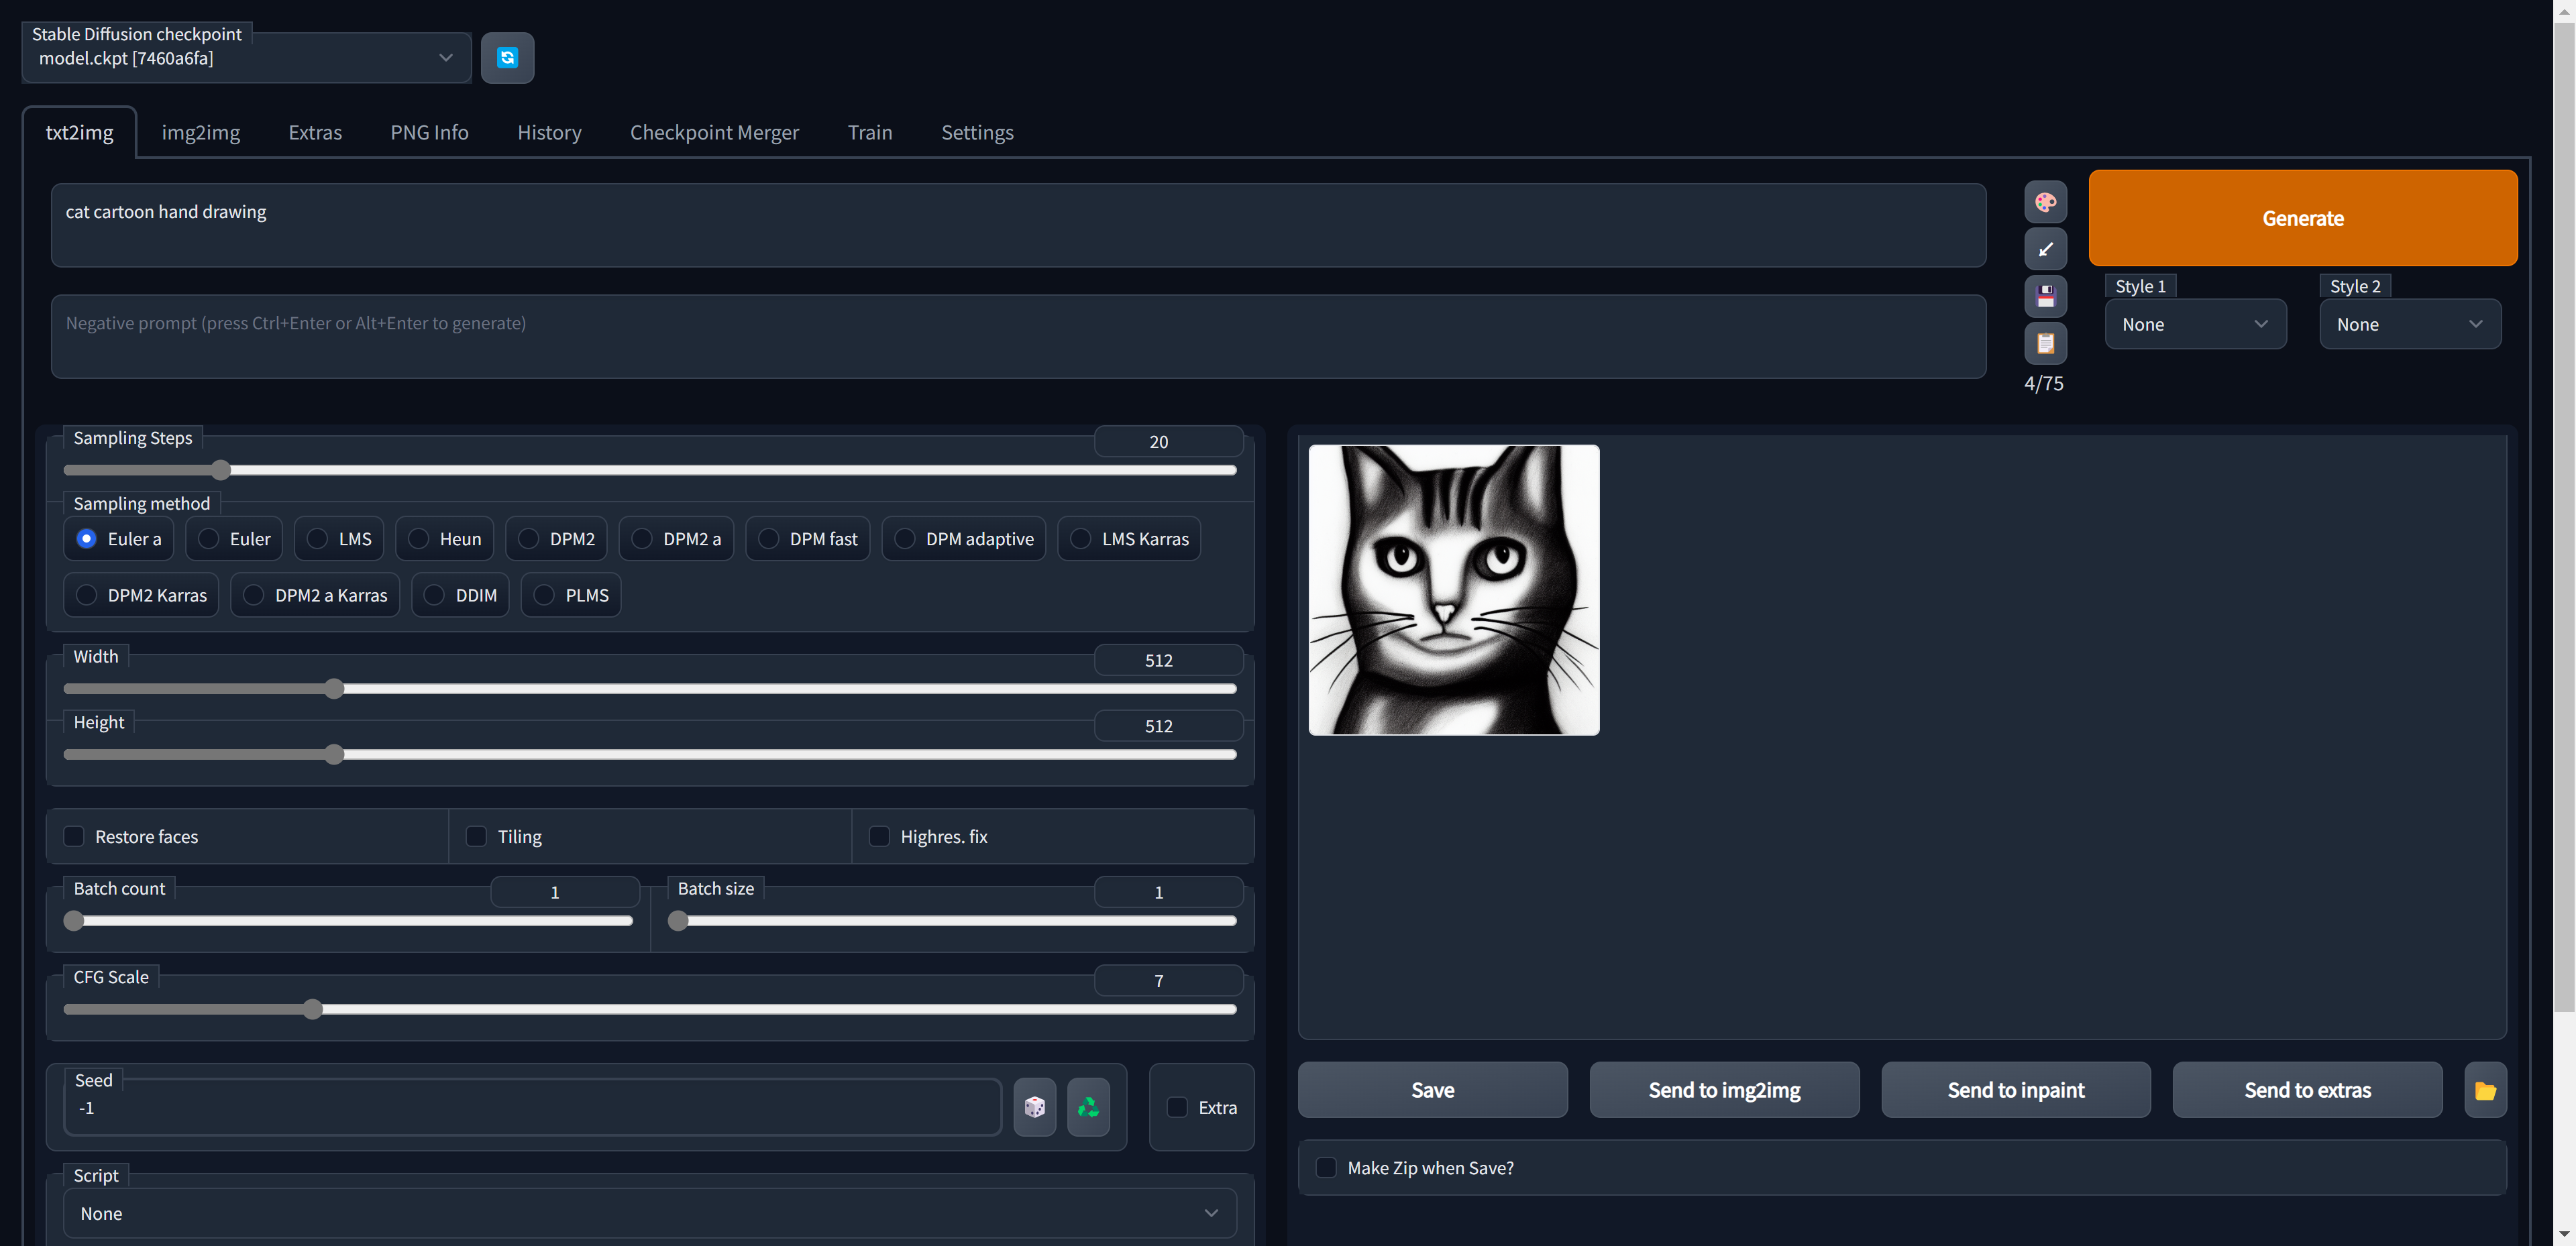
放下测试的结果(一个奇奇怪怪的小猫)