CentOS7.9 搭建内部yum源服务器同步阿里yum源环境说明:
1、企业内网需求:企业内部许多服务器是不能连接互联网,但每台centos主机安装软件包时都配置本地yum源很麻烦,也缺少第三方yum源,因此在内网搭建一台yum源服务器满足这一需求,同时网络层面策略只允许此yum源服务器每周日晚限时联网同步阿里云的yum源。
参考连接:http://blog.itpub.net/70004783/viewspace-2790196/
2、准备两台测试主机,一台用作yum源服务器(能连互联网),一台用作客户端。
3、系统版本:CentOS 7.9
实操步骤:一、添加阿里云yum源
备份原系统的repo
[root@yumserver ~]# mkdir /etc/yum.repos.d/backup[root@yumserver ~]# mv /etc/yum.repos.d/*.repo /etc/yum.repos.d/backup添加阿里云yum源并缓存(Centos-7.repo是软件仓库配置文件,epel-7.repo是扩展源、提供额外的软件包)
[root@yumserver ~]# curl -o /etc/yum.repos.d/CentOS-Base.repo https://mirrors.aliyun.com/repo/Centos-7.repo[root@yumserver ~]# curl -o /etc/yum.repos.d/epel.repo http://mirrors.aliyun.com/repo/epel-7.repo[root@yumserver ~]# yum makecache[root@yumserver ~]# yum repolist二、安装相关软件
[root@yumserver ~]# yum install -y wget make cmake gcc gcc-c++ pcre-devel zlib-devel openssl openssl-devel httpd yum-utils createrepo备注:
yum-utils:yum-utils是yum的工具包集合,reposync一个同步工具。createrepo:createrepo是一个对rpm文件进行索引建立的工具,就是对指定目录下的rpm文件进行检索,把每个rpm文件的信息存储到指定的索引文件中,这样方便远程yum命令在安装更新时进行检索。httpd:通过Apache软件提供web服务,也可以使用nginx。三、同步阿里云yum源软件包到本地服务器指定目录/mirror(自定义目录)
创建存放软件包目录/mirror,(chown设置文件所有者和文件关联组,chmod控制用户对文件的权限)
[root@yumserver ~]# mkdir -p /mirror[root@yumserver ~]# chown -R apache:apache /mirror[root@yumserver ~]# chmod -R 755 /mirror同步阿里云yum源软件包
###参数-n指下载最新软件包,-p指定目录,指定本地的源--repoid(如果不指定就同步本地服务器所有的源),下载过程比较久(10个小时左右)[root@yumserver ~]# reposync -n --repoid=extras --repoid=updates --repoid=base --repoid=epel -p /mirror[root@yumserver ~]# du -sh /mirror/*9.0G /mirror/base16G /mirror/epel323M /mirror/extras3.3G /mirror/updates四、创建仓库索引
createrepo -po /mirror/base/ /mirror/base/createrepo -po /mirror/extras/ /mirror/extras/createrepo -po /mirror/updates/ /mirror/updates/createrepo -po /mirror/epel/ /mirror/epel/五、更新数据源
createrepo --update /mirror/base/createrepo --update /mirror/extras/createrepo --update /mirror/updates/createrepo --update /mirror/epel/六、启动并配置Apache服务
6.1、启动Apache(httpd)服务(如果没有httpd,需要yum install -y httpd 安装一下)
[root@yumserver ~]# systemctl start httpd[root@yumserver ~]# systemctl enable httpd[root@yumserver ~]# systemctl status httpd6.2、系统防火墙放行80端口(apache服务使用的是80端口)
[root@yumserver ~]# firewall-cmd --permanent --zone=public --add-port=80/tcpsuccess[root@yumserver ~]# firewall-cmd --reloadsuccess备注:必要时可以运行 systemctl restart httpd 重启一下服务。
6.3、关闭selinux(SELINUX=disabled)
[root@yumserver ~]# vi /etc/selinux/config 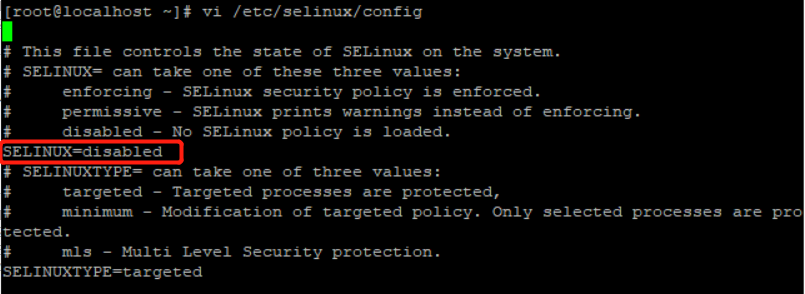
6.4、配置httpd.conf文件
[root@yumserver ~]# vi /etc/httpd/conf/httpd.confDocumentRoot "/mirror/" Options Indexes FollowSymLinks AllowOverride None Order allow,deny Allow from all Require all granted注意:上面配置的httpd.conf文件,需要找到如下图DocumentRoot字样的行进行更改,而不是直接复制粘贴插入。

6.5、修改web界面的 index.html 文件
###修改Apache默认首页index.html,直接复制粘贴执行cat < /usr/share/httpd/noindex/index.htmlCentOS 7 镜像 document.createElement("myHero")myHero { display: block; background-color: #ddd; padding: 10px; font-size: 20px;} 简介
CentOS,是基于 Red Hat Linux 提供的可自由使用源代码的企业级 Linux 发行版本,是一个稳定,可预测,可管理和可复制的免费企业级计算平台。
CentOS 7 配置内部YUM源
1、备份
mkdir /etc/yum.repos.d/backup mv /etc/yum.repos.d/*.repo /etc/yum.repos.d/backup/
2、下载新的 CentOS-Base.repo 到 /etc/yum.repos.d/
curl -o /etc/yum.repos.d/CentOS-Base.repo http://xx.xx.xx.xx/repo/CentOS-Base.repo
3、运行 yum makecache 生成缓存
4、运行 yum repolist 查看已经生成缓存
EOF注意: 上文中的 http://xx.xx.xx.xx 填写自身yum源服务器的ip地址。
七、编写yum源客户端配置文件
创建repo文件夹
[root@yumserver ~]# mkdir -p /mirror/repo/###复制粘贴执行,注意:xx.xx.xx.xx需要更改为服务器ip地址。[root@yumserver ~]# cat < /mirror/repo/CentOS-Base.repo[base]name=CentOS- Base - xx.xx.xx.xxfailovermethod=prioritybaseurl=http://xx.xx.xx.xx/base/enable=1gpgcheck=0 #released updates [updates]name=CentOS- Updates - xx.xx.xx.xxfailovermethod=prioritybaseurl=http://xx.xx.xx.xx/updates/enable=1gpgcheck=0 #additional packages that may be useful[extras]name=CentOS- Extras - xx.xx.xx.xxfailovermethod=prioritybaseurl=http://xx.xx.xx.xx/extras/enable=1gpgcheck=0 #additional packages that may be useful[epel]name=CentOS- Epel - xx.xx.xx.xxfailovermethod=prioritybaseurl=http://xx.xx.xx.xx/epel/enable=1gpgcheck=0EOF八、客户端配置yum源
登录客户端操作系统执行以下命令(注意:xx.xx.xx.xx为yum源服务器的ip地址)
[root@client ~]# mkdir /etc/yum.repos.d/backup/[root@client ~]# mv /etc/yum.repos.d/* /etc/yum.repos.d/backup/[root@client ~]# curl -o /etc/yum.repos.d/CentOS-Base.repo http://xx.xx.xx.xx/repo/CentOS-Base.repo[root@client ~]# yum makecache用户也可以用浏览器访问 http://xx.xx.xx.xx 查看配置客户端yum源的方法

九 、设置定时同步yum源的任务
编辑脚本
[root@yumserver ~]# cat /mirror/script/centos_yum_update.sh#!/bin/bashecho 'Updating Aliyum Source'DATETIME=`date +%F_%T`exec > /var/log/aliyumrepo_$DATETIME.logreposync -np /mirrorif [ $? -eq 0 ];then createrepo --update /mirror/base createrepo --update /mirror/extras createrepo --update /mirror/updates createrepo --update /mirror/epel echo "SUCESS: $DATETIME aliyum_yum update successful" else echo "ERROR: $DATETIME aliyum_yum update failed" fi添加定时任务,每周一凌晨1点执行
[root@yumserver ~]# crontab -l0 1 * * 1 /bin/bash /mirror/script/centos_yum_update.sh至此,结束。。。
问题:有时服务器端的yum源仓库索引没有更新成功。手动更新:[root@yumserver ~]# createrepo --update /mirror/base/[root@yumserver ~]# createrepo --update /mirror/extras/[root@yumserver ~]# createrepo --update /mirror/updates/[root@yumserver ~]# createrepo --update /mirror/epel/